


We recently updated the Konstru web app as well as the desktop plugins that connect your favorite BIM analysis and modeling software tools to the Konstru cloud. In that update, we put a big emphasis on improving the connection between Konstru and Microsoft Excel. If you’ve been using Konstru for a while, you may have noticed some of these updates. If you’re fairly new to Konstru (it’s ok, we’re pretty much brand new, too), then here’s pretty much everything you can do with Excel and Konstru.
Also, a quick note: we’ve created these tutorial videos as “silent movies”, meaning there is no commentary. Each step for you to follow is nicely and clearly labeled. Finally, these videos are really short. The longest video is only a minute and 18 seconds.
Change the Thickness of a Wall
Making a change to a wall (or many walls) is very simple when you use the MS Excel plugin for Konstru. Download, change, upload. Instantly see the wall – and the changes you made – in the Konstru 3D viewer in your browser.
Change a Section
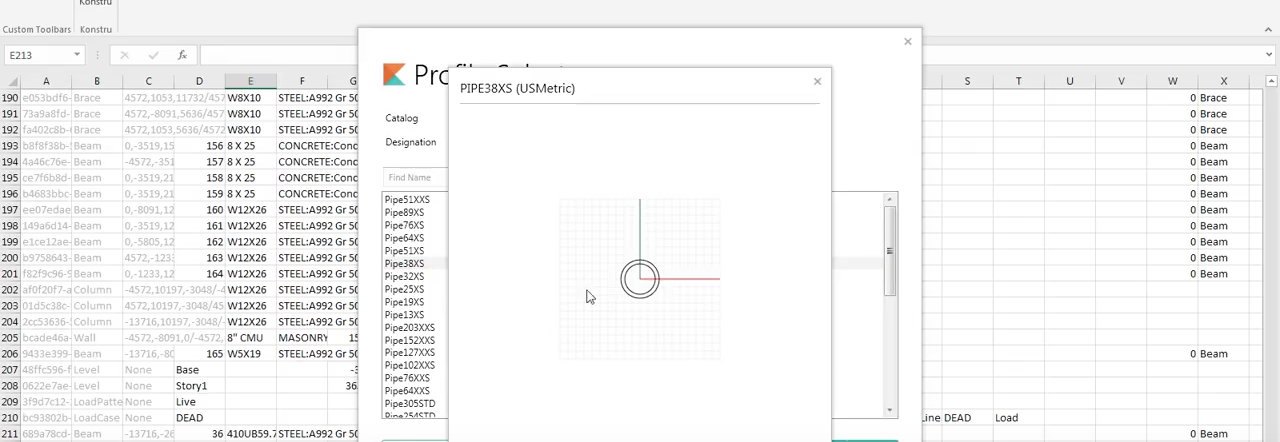
Changing an entire section in Excel in just 4 simple mouse clicks. Select your profile section, select Catalog and Designation, select Profile, and re-sync with Konstru. Before you re-sync, the Konstru plugin for Excel shows you a preview of your new section. And, remember, Konstru saves every change to your model, and you can name this specific change so you’ll know exactly what you changed. In seconds, you can view your changes in 3D securely in the Konstru cloud.
Create a Beam
Copy an existing beam, give it a new ID and geometry, and sync to Konstru. Then immediately see the new beam in your model in 3D.
Create a Rectangular Section
Create a new profile with height, width, name and catalog. Preview the new section, choose the model you want to update, and name the new version of that model. Konstru automatically compares the model you’re working on with the latest model in the cloud and shows you the difference(s). Apply your changes and view your new model in 3D.
Add a New Attribute
First, you’ll filter the attributes by level. Then add a new attribute title and fill the column with that title. Run the Konstru plugin and select the model you want to update. Update the model with a specific description of what you’re changing (e.g., a new attribute). Preview your changes, and view your updated model.
Add a Beam and a Grid
Open your Excel model and go to the “Grids” tab. Copy an existing row and paste it to a new row. Input the X, Y, Z coordinates of your new grid, and change it’s name from the previously pasted grid. Delete the ID of your new grid. Run the Konstru plugin for Excel, choose the model you want to update, describe your changes (be specific!), preview your changes, and check out your new model in 3D!
Change the Rotation Attribute of an Element
Using Excel, first, filter by element level, then change the rotation value of one or more elements. Run the Konstru plugin for Excel, select the model you want to update, give your update a specific name (e.g., describe your changes), preview your changes, and view your newly updated model in the Konstru 3D web viewer.
Change the size of one or more sections
Start by filtering your model by level in Excel. Then right click on the section you want to change and select a Konstru profile from the popup menu. Select the section you want to change, copy/paste the value to all the elements in that section, and run the Konstru Excel plugin.
Download a model
Every other Excel video we’ve described has demonstrated how to upload changes from Excel to Konstru. This video shows you how to download a model from Konstru into Excel. It doesn’t matter what program you used to create the model (Revit, Tekla, etc.). You can always download the model to Excel using Konstru to maintain the model’s native geometry. To download a model, open a blank Excel spreadsheet and run the Konstru plugin. Select the model you want to download, then explore all the content of your model organized by Element Type. All the BIM data from your model is now in Excel.
What Else Do You Need To Do In Excel?
How often do you use Excel as a modeling or analysis tool for your BIM projects? Most engineers wouldn’t hear of going without Excel as one of their most essential tools. That’s why we’re making sure we make Konstru work with Excel to do everything else you need to do. What else do you need to do?

Thornton Tomasetti
KONSTRU’s user - friendly data environment makes 3D BIM collaboration a breeze. Our web-based platform translates data between building design and analysis applications so models can be synchronized without needing to be reworked. Designers no longer have to waste valuable hours reentering models into their preferred software, so KONSTRU can save time and money – and eliminate the risk of entry errors.